Using Moxie
Getting started
From a fresh wallet to your first trade in about five minutes. Moxie currently runs on Solana devnet, so everything here uses free test funds.
Set your wallet to Devnet
Moxie runs on Solana’s devnet, a test network where tokens have no real value. Your wallet has to be on the same network, or transactions will fail.
- Phantom: Settings → Developer Settings → turn on Testnet Mode → choose Solana Devnet.
- Solflare: Settings → Network → Devnet.
- Backpack: Settings → Solana → RPC connection → Devnet.
Connect your wallet
Open any market from the Markets page. The trading screen looks like this before you connect:
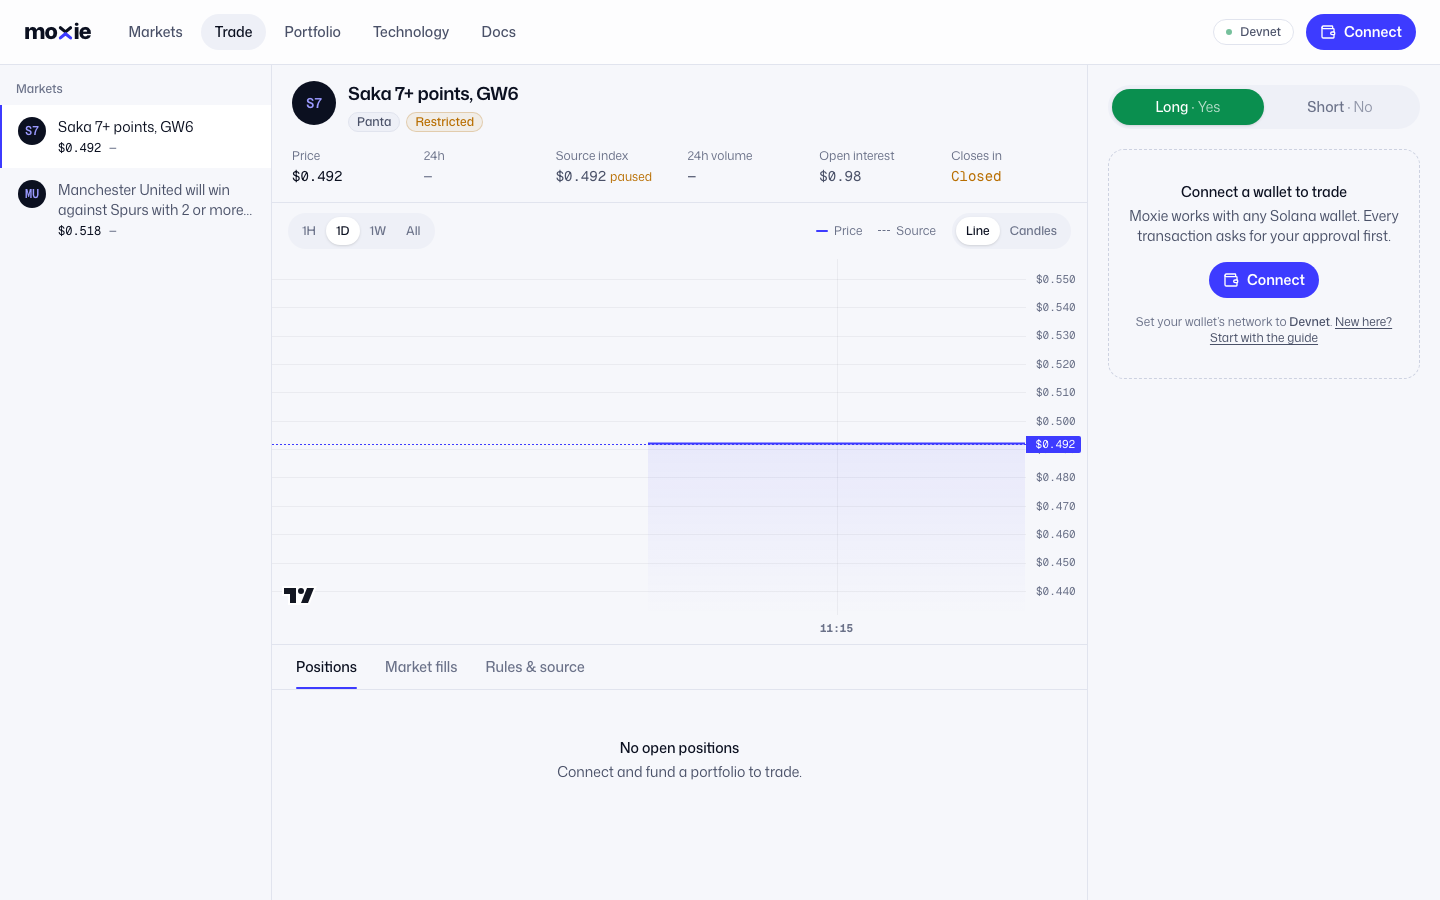
- 1. Connect opens the wallet picker. It’s always in the top-right corner.
- 2. The order ticket also shows a Connect button, plus a reminder to use Devnet.
- 3. The market list. Click any market to switch to it.
- 4. Market stats: the current price, its 24-hour change, the source market’s price, volume, open interest and time until the event closes.
- 5. The price chart. The blue line is the market’s price (its protected mark); the dashed line is the source index.
Pick your wallet in the dialog and approve the connection. Your shortened address replaces the Connect button when you’re connected.
Create your portfolio
Your portfolio is your trading account on Moxie. It holds your collateral and every position you open, across all markets. You create it once.
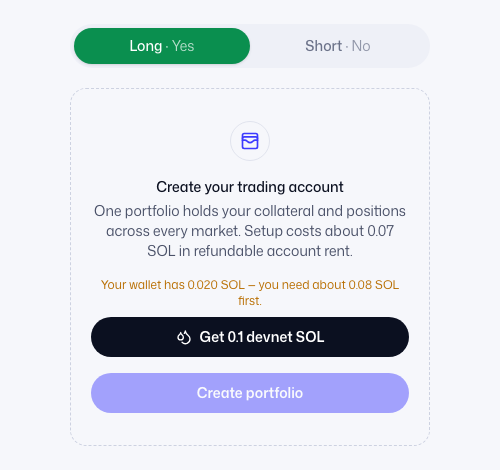
- 1. Creating a portfolio costs about 0.07 SOL of refundable account rent. If your wallet has less than that, click Get 0.1 devnet SOL first.
- 2. Then click Create portfolio and approve it in your wallet. It appears within a few seconds.
Add collateral
Positions are backed by USDC collateral in your portfolio. On devnet, Moxie hands out free test USDC.
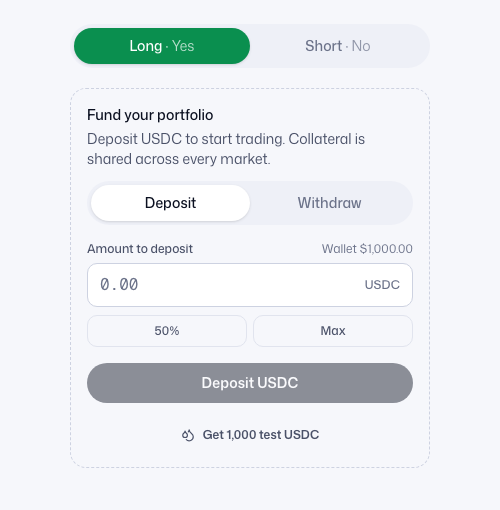
- 1. Get 1,000 test USDC sends test USDC to your wallet (no approval needed).
- 2. Type how much to deposit, or use 50% / Max. The right-hand label shows your wallet balance.
- 3. Deposit USDC moves it into your portfolio. Approve it in your wallet.
Place a trade
Contracts trade between $0 and $1, and the price follows how likely the source market thinks the event is. Go long if you expect the price to rise, short if you expect it to fall.
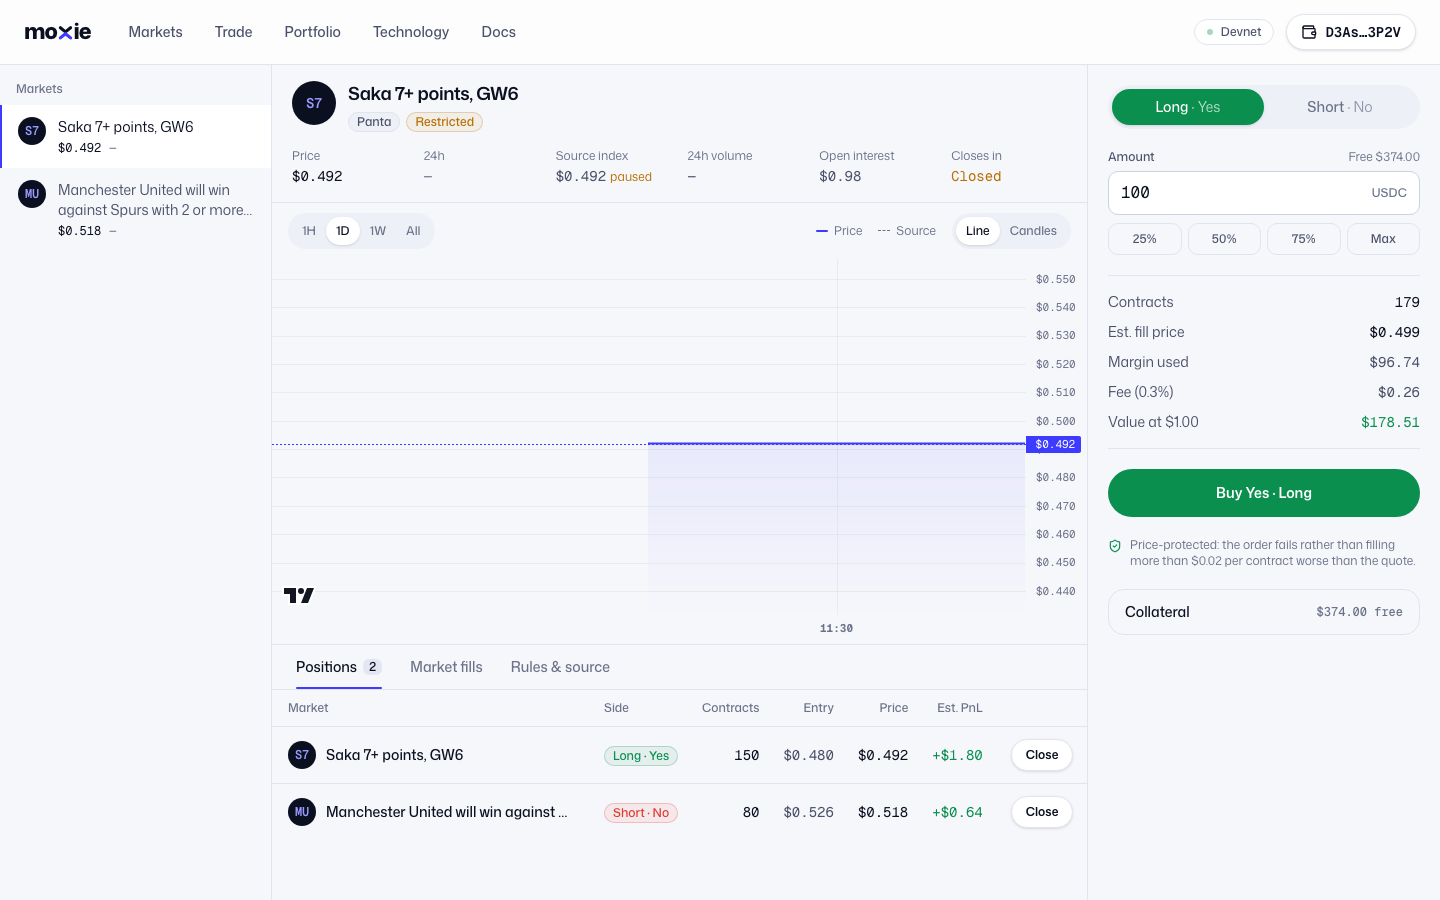
- 1. Choose Long · Yes or Short · No.
- 2. Enter the amount of collateral to use, or pick 25% / 50% / 75% / Max of your free collateral.
- 3. Check the summary: number of contracts, estimated fill price, margin used, the 0.3% fee, and what the position would be worth if the price reached $1 (or $0 for a short).
- 4. Click Buy Yes · Long (or Buy No · Short) and approve in your wallet. The order is price-protected: it fails rather than fill more than $0.02 per contract worse than the quote.
- 5. Collateral expands to deposit or withdraw without leaving the screen.
- 6. Change the chart’s time range, or switch to candles. Your own fills show up as labelled arrows.
Manage and close positions
Open positions appear under the chart on the trading screen, and on the Portfolio page.
- 1. The Positions tab lists every open position across all markets. Market fills shows recent trades in this market.
- 2. Est. PnL is your profit or loss at the current price.
- 3. Close exits the whole position at the current price, with the same $0.02 price protection.
Check your portfolio and withdraw
The Portfolio page shows your whole account.
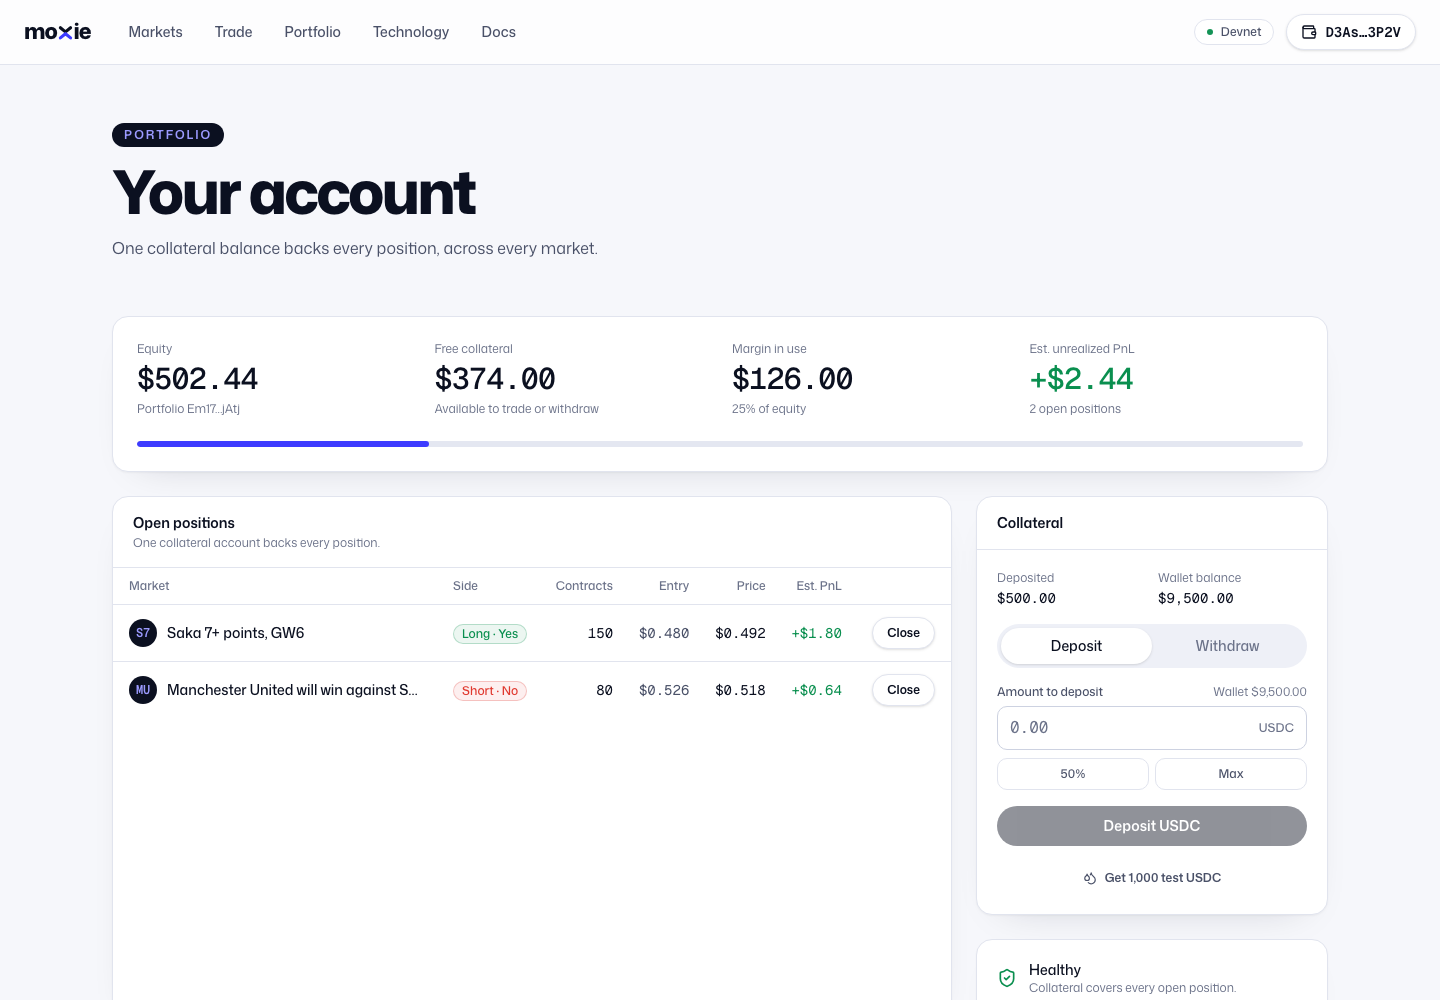
- 1. Equity (deposits plus profit and loss), free collateral (what you can trade with or withdraw), margin in use and unrealized PnL.
- 2. The bar shows how much of your equity is committed as margin. Blue is comfortable; amber and red mean you’re close to your limit.
- 3. Close any position from here too.
- 4. Switch between Deposit and Withdraw.
- 5. Enter an amount and confirm. You can withdraw any collateral that isn’t backing open positions.
- 6. Health tells you whether your collateral covers your positions.